Diabetes and altitude: safely in the mountains
Published 5 May 2026 · 17 min read
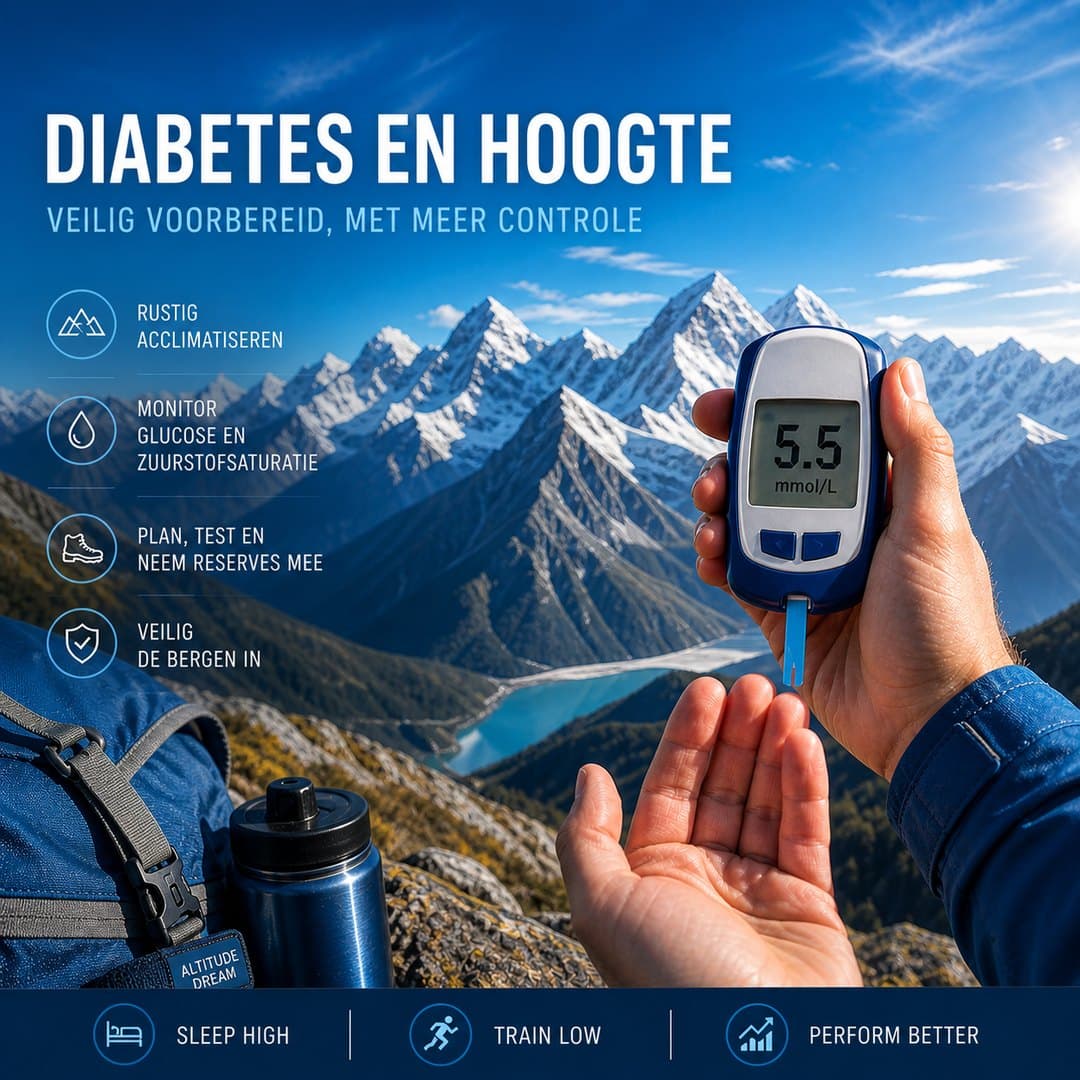
Diabetes and height require different preparations than a normal mountain trip. Not because diabetes automatically makes a mountain trip impossible, but because altitude adds extra variables: cold, exertion, less appetite, worse sleep, lower oxygen pressure, changing glucose requirements and sometimes less reliable measurements. Those who organise this well in advance can reduce many risks.
The gist is simple: start not only with a route plan, but also with a diabetes plan, an acclimatisation plan and an objective monitoring plan. For many mountain athletes, acclimatising at home before a mountain expedition be an important additional layer of safety in this regard. An altitude tent makes the hypoxic stimulus controlled, measurable and planable before you travel.
Short answer: with diabetes you can go into the mountains, but altitude requires extra preparation. Discuss your trip in advance with your doctor or diabetes nurse, take ample reserves with you, monitor glucose and SpO2 as a trend, build altitude slowly and preferably leave already partially acclimatised. An altitude tent can help to build up the initial oxygen boost in a controlled way at home.
Conclusion: diabetes is not an automatic reason to avoid altitude, but it is a reason to plan more precisely.
Nuance: the greatest risk is often not in one factor, but in the combination of altitude, cold, exertion, nutrition and measurement uncertainty.
Practical hook: Work with fixed decision rules for glucose, SpO2, complaints, rest days and when you don't rise further.
Diabetes and height: where's the real risk?
With altitude, many people think mainly of oxygen deprivation and altitude sickness. That's true, but with diabetes, a second layer is added. Your body reacts at altitude with more breathing work, higher stress response, cold, sleep disruption and often less appetite. At the same time, while hiking, climbing, skiing or expedition work, you usually consume more energy than at home.
As a result, your glucose may react differently than expected. Some people see low values faster due to prolonged exercise and eating less. Others, on the contrary, see higher values due to stress hormones, cold, poor sleep or incipient altitude sickness. Moreover, this is not always predictable, especially in the first few days.
In addition, symptoms can mask each other. Headache, nausea, fatigue, weakness, trembling or difficulty concentrating can fit altitude sickness, but also hypos, hyperglycaemia, dehydration or undereating. That's why measuring is important. Yet you need to interpret those measurements wisely. A single value says less than a pattern over several moments.
⚠️ Reality check
This article does not replace personal medical advice. Especially in case of insulin use, previous severe hypos, ketoacidosis, retinopathy, kidney problems, neuropathy, cardiovascular disease or use of glucose-lowering medication, a medical travel check beforehand is important.
Why diabetes and altitude require extra preparation
Altitude changes the conditions in which you normally regulate your diabetes. At sea level, you often know your response to training, meals and sleep. In the mountains, those anchors shift. The day starts colder. Nights are more restless. You eat differently. Moreover, you move longer and sometimes have to keep going when you have less of an appetite.
Therefore, it is wise to approach diabetes and altitude not as one medical problem, but as a system. You want to know in advance what to do in case of low glucose, high glucose, nausea, ketones, equipment problems, cold hands, broken sensor, dead battery or an unexpected extra night above the planned altitude.
For mountain athletes with diabetes, the difference between control and improvisation is especially significant. A good plan does not mean that everything becomes predictable. However, it does make you less dependent on quick decisions at a time when you are cold, tired or low on oxygen.
The main influencers
- Hypoxia: less available oxygen increases the physiological load.
- Cold: can affect readings, insulin storage and body responses.
- Effort: prolonged exercise increases the risk of hypo.
- Sleep loss: may interfere with recovery and glucose control.
- Less appetite: makes solid carbohydrate intake more difficult.
- Dehydration: may worsen glucose levels and symptom picture.
- Route profile: rapid ascent increases the risk of altitude sickness.
For whom is extra caution needed?
Not everyone with diabetes has the same risk profile. Someone with stable type 2 diabetes, with no complications and with a gentle trek to 2,500 metres has a different profile than someone with type 1 diabetes, a pump, CGM, previous severe hypos and an expedition above 5,000 metres.
Still, for everyone: assess not just your diagnosis, but your overall situation. Look at your recent glucose monitoring, your experience with long exercise, your ability to recognise hypos, your medication, your equipment and the altitude at which you go to sleep.
When should you seek medical advice beforehand?
- If you use insulin or had severe hypos before.
- If you have ever had ketoacidosis.
- If you have diabetes complications, such as retinopathy, neuropathy, kidney problems or cardiovascular disease.
- If you go to sleep above 3,000 metres.
- If you are travelling to a remote area with limited medical assistance.
- If you are taking medication where illness, dehydration or low eating poses additional risk.
A medical check is not meant to make your trip impossible. On the contrary, the aim is for you to leave with more certainty. For example, you discuss medication adjustment, sick-day rules, ketone policy, emergency glucagon, hypo approach, travel insurance, medical certificate and what your travel companions need to know.
What height does to glucose, energy and complaints
The reaction to altitude varies from person to person. Moreover, the reaction varies by stage. The first days at altitude are often the messiest. You sleep lighter, your breathing changes, your body works harder and your daily schedule differs from home. As a result, your glucose profile may be different.
Why the first few days are often the most decisive
Especially in the beginning, many stimuli accumulate. Your body has to get used to less oxygen, while you often also move more, eat differently and sleep worse. This can make glucose levels temporarily less predictable, even if you are normally stable at home.
In some mountain athletes, glucose falls during long, low-intensity exercise. In others, glucose actually rises due to stress hormones, cold exposure, altitude sickness or inadequate recovery. An incipient infection, stomach upset or dehydration can also disturb the picture.
Therefore, it is important not to separate glucose values from context. Note not only the number, but also: altitude, exercise, diet, sleep, cold, symptoms, insulin or medication, hydration and trend direction.
| Height zone | What will change? | Diabetes focus | Practical choice |
|---|---|---|---|
| 2.000-2.500 m | Slight height incentive, often still good to dose. | Cold and extra activity can already affect glucose. | Measure more often than at home and test your routines. |
| 2.500-3.500 m | Chance of altitude complaints increases markedly. | Symptoms may resemble hypo, hyper or dehydration. | Ascend slowly and monitor symptoms in addition to glucose. |
| 3.500-4.500 m | Sleep, appetite and recovery are more likely to be affected. | Prolonged exercise and eating less increase risk of dysregulation. | Plan rest days, back-up nutrition and clear decision rules. |
| 4.500 m+ | Hypoxic load increases substantially. | Measurement errors, cold, fatigue and altitude sickness can come together. | Only with tight plan, experienced guidance and conservative build-up. |
What will change? Slight height incentive, often still good to dose.
Diabetes focus Cold and extra activity can already affect glucose.
Practical choice Measure more often than at home and test your routines.
What will change? Chance of altitude complaints increases markedly.
Diabetes focus Symptoms may resemble hypo, hyper or dehydration.
Practical choice Ascend slowly and monitor symptoms in addition to glucose.
What will change? Sleep, appetite and recovery are more likely to be affected.
Diabetes focus Prolonged exercise and eating less increase risk of dysregulation.
Practical choice Plan rest days, back-up nutrition and clear decision rules.
What will change? Hypoxic load increases substantially.
Diabetes focus Measurement errors, cold, fatigue and altitude sickness can come together.
Practical choice Only with tight plan, experienced guidance and conservative build-up.
Altitude tent in diabetes and altitude: why it can be valuable
An altitude tent in diabetes is not a medical treatment. Nevertheless, it can be a valuable preparation for mountain athletes travelling to altitude. The advantage is mainly in control. In an altitude tent, you lower the oxygen percentage in the air. This is called normobaric hypoxia. The air pressure remains the same, but the oxygen stimulus seems physiological at altitude.
Why testing at home is extra valuable
This allows you to get used to lower oxygen availability already at home. You sleep in the stimulus, but you train and live normally during the day. This is in line with the principle of sleep high, train low. For people with diabetes, this is interesting because you can learn in a safe environment how your body reacts to hypoxia, sleep change and lower SpO2.
An altitude tent does not make the trip risk-free. Nor does it give a 100% guarantee against altitude sickness. It does, however, make the process measurable and planable. You can build up, track your sleep quality, assess your morning feeling, monitor your SpO2-trend and observe your glucose pattern at the same time. As a result, you leave for the mountains less abruptly.
Especially with diabetes, this predictability is important. You don't want to discover only at 3,500 metres that your sleep deteriorates significantly, your appetite drops or your glucose pattern becomes more unsettled. A controlled build-up at home can therefore help to start the first adaptation stimulus earlier and make the transition to the mountains calmer.
🧭 In practice
In diabetes, an altitude tent is especially valuable as part of a broader plan: medical check, glucose plan, inventory strategy, route construction, SpO2-monitoring and clear decision rules. The tent does not replace acclimatisation on the mountain, but it can significantly improve the starting position.
Preparation protocol: 6 weeks to departure
Good preparation does not start at the airport. Especially with diabetes and altitude, you want to switch gears at least several weeks before departure. Not because everything has to get complicated, but because you want to calmly test what can still be adjusted at home.
Practical protocol for diabetes and altitude
| Timing | Focus | Action | Why this matters |
|---|---|---|---|
| 6 weeks in advance | Medical check | Discuss route, altitude, medication, hypos, ketones and complications. | You want personal decision rules before you leave. |
| 4 weeks in advance | Equipment and backup | Arrange extra sensors, strips, insulin, batteries, glucagon and snacks. | Remote areas leave little room for improvisation. |
| 3-4 weeks in advance | High-rise tent construction | Start sleeping peacefully in normobaric hypoxia and follow SpO2 as a trend. | You make the oxygen stimulus controlled and measurable. |
| 1-2 weeks in advance | Simulation | Test daypack, nutrition, gauge, CGM, cold protection and emergency plan. | You discover practical weaknesses still at home. |
| While travelling | Conservative rise | Combine route acclimatisation with glucose, complaint and SpO2-trends. | You steer by pattern, not a single loose value. |
Focus Medical check.
Action Discuss route, altitude, medication, hypos, ketones and complications.
Why this matters You want personal decision rules before you leave.
Focus Equipment and backup.
Action Arrange extra sensors, strips, insulin, batteries, glucagon and snacks.
Why this matters Remote areas leave little room for improvisation.
Focus Height tent construction.
Action Start sleeping peacefully in normobaric hypoxia and follow SpO2 as a trend.
Why this matters You make the oxygen stimulus controlled and measurable.
Focus Simulation.
Action Test daypack, nutrition, gauge, CGM, cold protection and emergency plan.
Why this matters You discover practical weaknesses still at home.
Focus Conservative rise.
Action Combine route acclimatisation with glucose, complaint and SpO2-trends.
Why this matters You steer by pattern, not a single loose value.
Those using a high altitude tent should preferably build up gradually. Don't start too high right away. Look first at sleep, recovery, morning feeling and SpO2-trend. A practical principle is that the stimulus may be felt, but should not become disruptive. So more height is not automatically better.
For a safe build-up, it is wise to match the schedule to your travel goal, your diabetes profile and your experience with altitude. You can find more explanation on gentle build-up in the article on the altitude tent construction diagram.
Measuring equipment, cold and glucose levels
In the mountains, measuring is essential, but measuring equipment has limits. Cold fingers can affect a finger prick. Test strips, insulin, batteries, meters, pump and CGM sensors do not always function optimally in extreme temperature, humidity or altitude load. Therefore, back-up is not a luxury.
Preferably, use a CGM as a trending instrument. This is valuable because you can see whether glucose is rising, falling or remaining stable. Nevertheless, it is still wise to take a finger prick meter with you. Especially in case of doubt, complaints, rapid decline, cold conditions or values that do not fit your gut.
Practical measuring rules in the mountains
- Store meter, strips, insulin and pump supplies close to the body.
- Prevent freezing of insulin and test strips.
- Warm hands before taking a finger prick.
- Always carry a back-up meter.
- Bring enough batteries, power bank and charging cables.
- Compare CGM trend with finger prick when in doubt.
- Explain to your travelling companions where your hypo-treatment and glucagon are.
In case of high values, nausea, feeling sick or not eating much, it is important to follow your own ketone policy. This is especially true for people with type 1 diabetes and those where their treatment team recommends ketone control. Discuss this before leaving, as the right approach varies from person to person.
Altitude sickness, hypo or hyper: here's how to avoid confusion
One of the trickiest situations is recognising symptoms. Altitude sickness and glucose disruption can look similar. Think headache, nausea, weakness, dizziness, fatigue, trembling, loss of concentration or restless sleep.
Therefore, when you have symptoms, don't guess. Measure glucose. Look at your SpO2-trend. Assess your sleep. Check hydration. Then look at the route profile. Above all, don't rise further if symptoms are unexplained or unstable.
A good rule of thumb is that complaints at height remain serious until the contrary is clear. Find out more about alarm signals in the article on altitude sickness symptoms and risks.
Comparison: hypo, hyper and altitude sickness
| Situation | May resemble | Doing what immediately? |
|---|---|---|
| Hypo | Weakness, trembling, sweating, confusion, fatigue. | Measure glucose, treat according to own hypo plan, do not proceed alone. |
| Hyper | Thirst, fatigue, headache, nausea, frequent urination. | Measure glucose, check hydration, follow ketone policy if relevant. |
| Altitude sickness | Headache, nausea, poor sleep, dizziness, no appetite. | Do not ascend further, rest, revise route and descend when deterioration occurs. |
May resemble Weakness, trembling, sweating, confusion, fatigue.
Doing what immediately? Measure glucose, treat according to own hypo plan, do not proceed alone.
May resemble Thirst, fatigue, headache, nausea, frequent urination.
Doing what immediately? Measure glucose, check hydration, follow ketone policy if relevant.
May resemble Headache, nausea, poor sleep, dizziness, no appetite.
Doing what immediately? Do not ascend further, rest, revise route and descend when deterioration occurs.
This is how you monitor this lens
With diabetes and altitude, you don't want to steer by feeling alone. Feeling is still important, but it is more unreliable when you are tired, cold or low on oxygen. Therefore, work with a simple daily rhythm for monitoring.
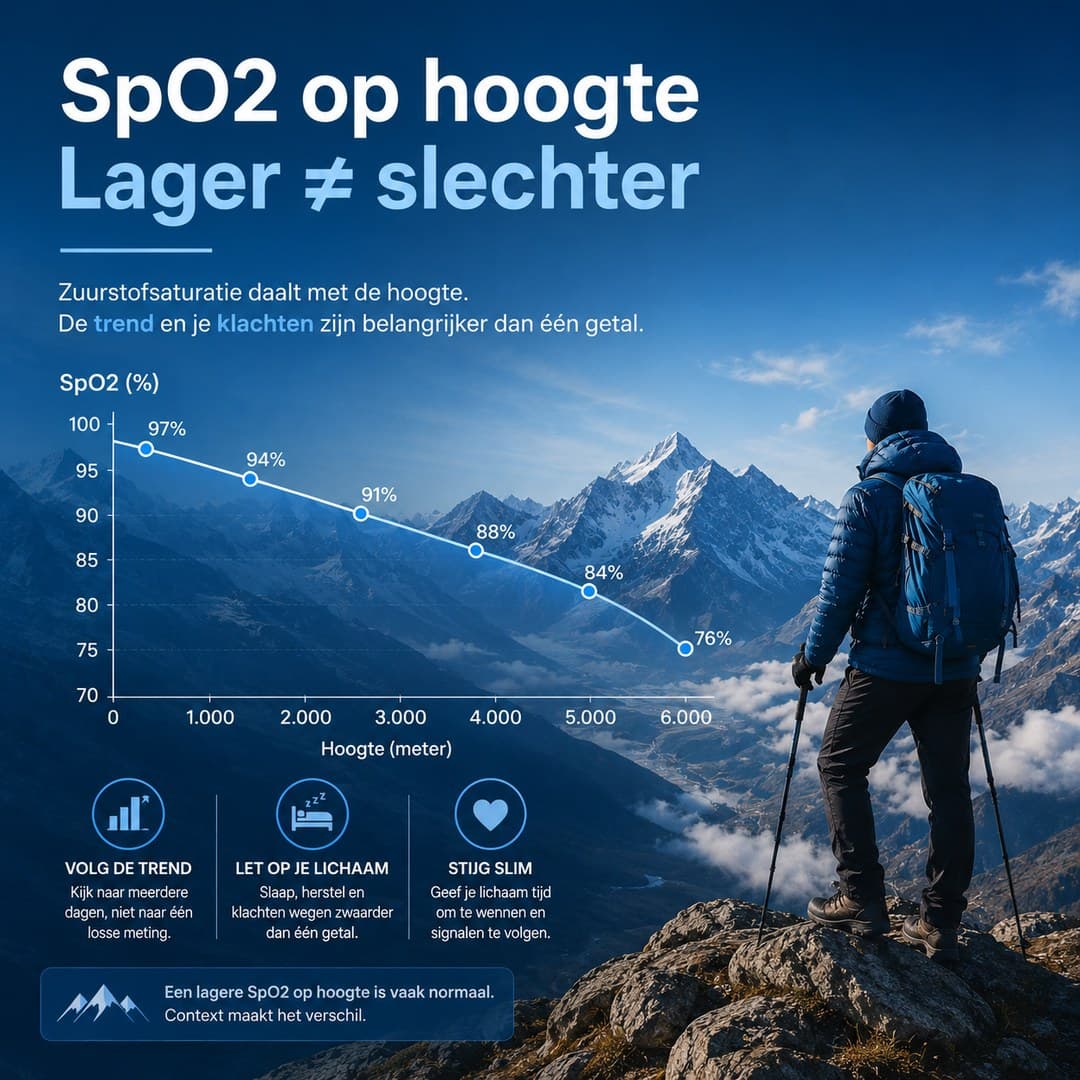
Use SpO2 always as a trend. A loose value can be affected by cold fingers, measurement position, breathing, movement or measurement quality. Rather, look at morning values, decrease compared to previous days, recovery after rest and correlation with symptoms. You can find more context in the article on oxygen saturation at altitude.
Daily monitoring
- Glucose: trend before, during and after exercise, plus nocturnal trend if available.
- SpO2: morning trend and recovery after rest, not one loose value.
- Sleep quality: sleeping through, restlessness, headache on waking.
- Recovery: heart rate sensation, fatigue, appetite and leg strength.
- Symptoms: headache, nausea, dizziness, tightness in the chest, confusion.
- Nutrition: carbohydrates, fluids, salts and actual intake.
- Material: sensor, strips, insulin, battery, pump, emergency kit.
Decision rules en route
- Stable: glucose within personal plan, no complaints, SpO2-trending appropriate, good sleep. You can move on as planned.
- Pay attention: repeated hypos, high values, poor sleep or mild altitude complaints. Take rest and do not ascend faster.
- Slowing down: Symptoms increase, eating is poor, glucose remains restless or SpO2-trend drops markedly. Plan additional recovery.
- Stop or drop: Confusion, coordination problems, tightness at rest, severe weakness, ketones or symptoms worsening. Seek medical attention.
What do you take extra with you?
A standard packing list is usually too thin for diabetes at altitude. Therefore, think in dual systems. One CGM is convenient, but not a complete emergency plan. One gauge is fragile. One snack box is insufficient. One person who knows what you have is better than no one, but ideally your entire climbing partner or guide will know the basics.
Checklist for diabetes and altitude
- Extra insulin or medication, well above your normal requirement.
- Back-up glucose meter with strips and lancets.
- CGM sensors or pump supplies plus spare plan.
- Fast carbs in several places in your luggage.
- Slower carbohydrates for long exercise days.
- Glucagon or emergency medication if prescribed.
- Ketone strips or ketone meter if relevant.
- Medical certificate and medication summary.
- Thermal protection for insulin, strips and meter.
- Powerbank, batteries and charging cables.
- Foot care, blister material and dry socks.
- Emergency plan shared with guide or travel companion.
Divide important items between several bags. Keep essential materials within easy reach at all times. Especially when flying, insulin does not belong in check-in baggage, as temperature and loss pose risks. In the mountains, preferably store materials close to the body, protected from cold and direct sunlight.
Common misunderstandings
“If my glucose is stable, altitude is not a problem”
Stable glucose control at home is a strong foundation, but no guarantee of altitude. Conditions change. That's why you don't just want to look at HbA1c or average values, but also at hypo recognition, exercise response, equipment management and emergency scenarios.
“A CGM solves everything”
A CGM is very valuable, especially for trends. However, cold, delay in tissue glucose, sensor problems and battery loss remain possible. Therefore, always take a working finger prick meter with you.
“An altitude tent completely prevents altitude sickness”
This is too absolute. An altitude tent can significantly reduce the risk of complaints by building up pre-acclimatisation in a controlled way. Still, route acclimatisation remains necessary. The tent makes the process measurable and planable, but it is not a 100% guarantee.
“Nausea at altitude is always altitude sickness”
Not always. Nausea can also come from hypo, hyperglycaemia, ketones, dehydration, infection, medication, cold or diet. Therefore, combine symptom assessment with glucose, SpO2, route profile and general condition.
When is a high altitude tent especially interesting?
An altitude tent makes particular sense if the trip has little margin. Think Kilimanjaro, Everest Base Camp, Andean treks, 6,000-metre peaks, skiing expeditions or trips where you quickly move to a relatively high sleeping altitude. That extra margin can also be valuable in diabetes, as you want fewer variables to converge at once in the first few days.
When acclimatising at home gives extra peace of mind
At home, you can quietly build up, adjust and observe. You can see how your sleep reacts. In addition, you can monitor your morning feeling, your SpO2-trend and find out whether hypoxic nights seem to be affecting your glucose pattern. This will also make the conversation with your doctor or diabetes nurse more concrete.
Do use an altitude tent wisely. Build up gradually. Don't force an extreme simulation altitude. Look at recovery. And keep your diabetes management leading. In case of symptoms, repeated glucose disruption or obvious sleep disturbance, adjusting is wiser than pushing on.
Quieter departure to altitude?
With diabetes, you want to make the transition to altitude as predictable as possible. With an altitude tent, you can build pre-acclimatisation at home in a controlled, measurable and planable way, as part of a broader medical and practical preparation plan.
Conclusion: safe mountaineering with diabetes
Diabetes and altitude can go together, but not on the basis of routine alone. The best preparation consists of three layers: medical advice, practical diabetes organisation and gentle acclimatisation. Those who combine these layers leave with more control.
An altitude tent can play an important role in this. Not as a panacea, but as controlled preparation. Your body receives an oxygen stimulus even before departure. Then you can monitor your reaction, adjust it and leave with more peace of mind. That way, you don't arrive completely unprepared in an environment where hypoxia, cold, exertion and sleep loss come together.
So the key choice is not just: can I go to altitude with diabetes? The better question is: how do I make my mountain journey as predictable, measurable and safe as possible? That's where good preparation starts.
FAQ on diabetes and altitude
Is altitude more dangerous if you have diabetes?
Not automatically. Height does require extra preparation, though, as glucose, cold, exercise, sleep, appetite and measuring devices affect each other. A personal plan makes all the difference.
Can I climb a tall mountain with type 1 diabetes?
This is possible in some cases, but only with good medical supervision, experience, back-up equipment, ketone policy, hypo-plan and conservative acclimatisation. Remote expeditions require extra caution.
Does an altitude tent help with diabetes and altitude?
An altitude tent can help build up the hypoxic stimulus in a controlled way at home. This makes pre-acclimatisation measurable and plannable. It does not replace medical advice or route acclimatisation.
Should I measure my glucose more often at altitude?
Yes, most of the time. Exercise, cold, sleep disruption, diet and altitude can cause your glucose to react differently. Use CGM trends and check with a finger prick when in doubt.
When should I stop rising?
Do not ascend further in case of unexplained symptoms, repeated hypos, persistently high values, ketones, confusion, tightness at rest or worsening altitude symptoms. Rest, descend or seek medical attention.
Sources and further exploration
For basic medical information around altitude, diabetes travel and acute altitude sickness, relevant sources include the CDC Yellow Book, CDC Diabetes, Diabetes UK and the Wilderness Medical Society. Use these sources as depth, and always consult with your own doctor or diabetes treatment team for personal risks.