Best acclimatisation schedule for Kilimanjaro: how to increase your chances of success
Published 21 December 2025 · 9 min read
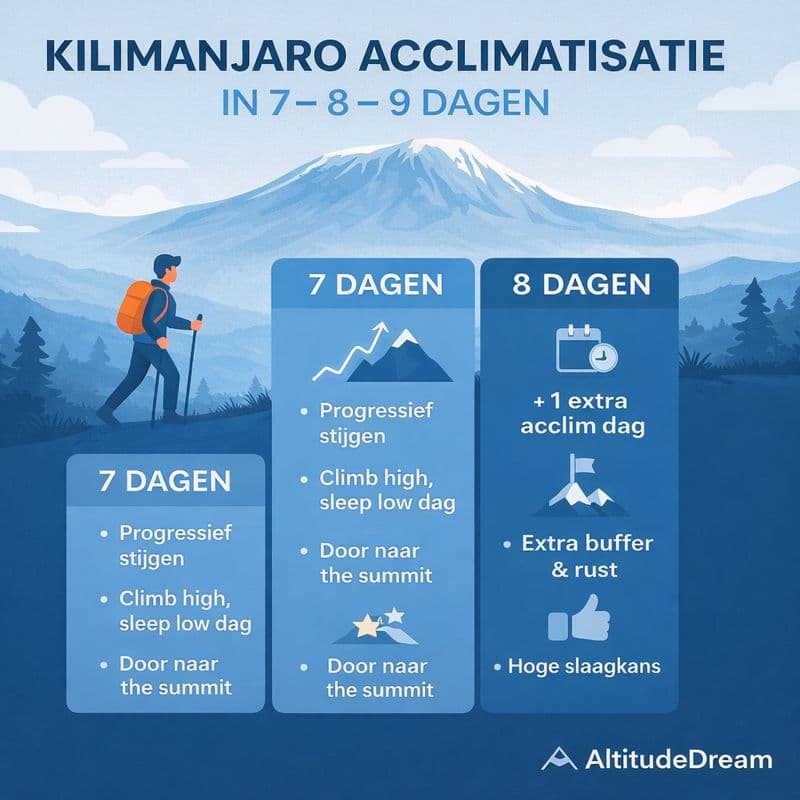
The best acclimatisation schedule for Kilimanjaro is simple: choose a route of at least 7 days, gradually increase your sleeping altitude and consciously plan acclimatisation moments (climb high, sleep low). This will reduce the risk of altitude sickness and significantly increase your chances of reaching Uhuru Peak.
In this article, you will learn:
- clear advice on which plan works best for you
- specific day-by-day acclimatisation schedules (7, 8 and 9 days)
- why some popular schedules are actually risky
- practical tips that will immediately give you more comfort and energy on the mountain
- how to pre-acclimatise at home with an altitude tent
Important: Kilimanjaro is “only” 5,895 metres high, but the ascent is extremely steep. In just a few days, you go from lowland to almost 6,000 metres. That is precisely why acclimatisation is so crucial here.
See also (internal links):
How can altitude sickness be prevented?
Altitude sickness: symptoms, risks and treatment
Altitude tent rental service: acclimatise at home
Why acclimatisation on Kilimanjaro so often goes wrong
Many hikers focus primarily on fitness. Understandable, but here's the reality: Being in good physical condition does not protect you from altitude sickness.. Kilimanjaro is an acclimatisation challenge, not just a hiking challenge. So you don't succeed by “being tougher”, but by “climbing smarter”.
The three main causes of problems on Kilimanjaro:
- Routes that are too short (5-6 days), which does not give your body time to adjust.
- Too rapid increase in sleeping height, especially once you get above 3000 metres.
- Too much pace and too little recovery (not drinking enough, not eating enough, not resting enough).
Your goal is not to “get up as quickly as possible”. Your goal is: making progress day after day without your body lagging behind.
The golden acclimatisation rules for Kilimanjaro
Regardless of the route, these rules almost always apply:
1) Choose at least 7 days on the mountain
For most people, 7 days is the absolute minimum. Eight days is better. Nine days is ideal if your time and budget allow.
2) Limit the increase in sleeping altitude (especially above 3000 metres)
A safe guideline is to avoid using the sleeping height Do not increase the altitude too quickly and regularly plan an extra night at the same altitude. (You can go higher during the day, as long as you sleep lower afterwards.)
3) Climb high, sleep low
This is the most powerful acclimatisation hack on Kilimanjaro. You make an extra climb during the day (or walk on to a viewpoint) and then descend to sleep. Your body gets the stimulus, but recovers better.
4) “Pole pole” is not a cliché, it is a strategy
Pole pole means “slowly, slowly”. That's not touristy. It's literally the best way to manage your breathing, heart rate and energy consumption at altitude.
Which route has the best acclimatisation schedule?
If you look purely at acclimatisation (and therefore success rate), you can stick to this:
- Best for acclimatisation: Northern Circuit (8–9 days) or Lemosho (8 days)
- Very good if you take 7 days: Machame (7 days) or Lemosho (7 days)
- Works well but is drier and has a different structure: Rongai (7 days)
- Acclimatisation risk with short variant: Marangu (5–6 days), Machame (6 days), Rongai (6 days)
Practical advice: if in doubt, choose Lemosho 8 days or Northern Circuit 9 days. In practice, these are the “acclimatisation-friendly” choices.
The best acclimatisation schedule per duration
Below are three schedules that work best in practice. Please note: exact camp names and heights may vary slightly depending on the operator. The logic behind them is the most important thing: increase progressively, acclimatise at the right time, and manage summit night wisely.
Schedule A: 7 days (minimum recommended)
For whom: You are reasonably fit, have no known problems with heights, and want a good balance between time and chance of success.
Important: 7 days works particularly well on routes with a smart elevation profile (Machame 7, Lemosho 7, Rongai 7).
- Day 1: Start gate to first camp (leisurely pace, focus on hydration).
- Day 2: Ascent to second camp. Finish with a gentle 20-30 minute acclimatisation walk after arrival.
- Day 3: Ascent to the third camp. If you feel good, do an extra climb (climb high) along the way.
- Day 4: Acclimatisation day or short stage with extra incentive (e.g. reaching a higher point and sleeping there).
- Day 5: To high camp (rest, drink plenty of fluids, eat early, stay warm).
- Day 6: Summit night to Uhuru Peak and descent to lower camp.
- Day 7: Exit to gate.
Why this works: You build in an extra acclimatisation moment for your high camp, making summit night less of a shock to your body.
Schedule B: 8 days (best all-round choice)
For whom: You want a significantly higher success rate, more leeway with minor complaints, and more energy to truly enjoy life.
This is our favourite for most Kilimanjaro trekkers.
- Day 1: Gate to camp 1. Keep a steady pace, don't push yourself.
- Day 2: To camp 2. After arrival: 20-40 min acclimatisation walk.
- Day 3: To camp 3 with “climb high, sleep low” (on some routes, you walk higher during the day and descend slightly for the night).
- Day 4: Quiet acclimatisation day or short stage with extra incentive (reach a higher point and return).
- Day 5: To high camp (very quiet, focus on warmth, food, drink).
- Day 6: Additional buffer: short acclimatisation walk or extra night around high camp level (depending on route and schedule).
- Day 7: Summit night to Uhuru Peak and descent to lower camp.
- Day 8: Exit to gate.
Why this works: That extra day (day 6) is invaluable. Your body has more time to stabilise ventilation and fluid balance. What's more, you can pick up on small signals early on without immediately risking your summit.
Schedule C: 9 days (maximum acclimatisation, slowest pace)
For whom: You want the best chance of a strong summit, you have had altitude sickness before, or you simply want more margin and less stress.
Typical: The Northern Circuit 9 days is the best-known example here.
- Day 1: Gate to camp 1.
- Day 2: To camp 2. Acclimatisation walk after arrival.
- Day 3: To camp 3 with extra motivation along the way.
- Day 4: Acclimatisation day: reach the highest point, return to sleep.
- Day 5: To camp 4. Steady pace, arrived early.
- Day 6: Short stage or acclimatisation walk (conserving energy).
- Day 7: To high camp. Everything in “recovery mode”.
- Day 8: Summit night and descent.
- Day 9: Exit to gate.
Why this works: You spread out the acclimatisation stimuli, keep the days shorter and prevent yourself from running out of steam on days 5-6.
Which plans you should avoid (even if they are popular)
5-6 day schedules: not enough time for the body
Many providers sell 5 or 6 days because it is cheaper and “nice and quick”. But physiologically, this is often a recipe for complaints. Your body simply cannot keep up with the same pace of adjustment as your rate of ascent.
If you really must go for a short trip, then choose at least a 6-day trip with a smart acclimatisation profile and strongly consider pre-acclimatise at home.
How can you tell that your acclimatisation is not going well?
Take signs seriously. On Kilimanjaro, complaints often come on gradually.
- Mild signs: mild headache, reduced appetite, restless sleep, shortness of breath
- Warning signs: persistent headache despite rest and drinking, nausea, dizziness, coordination problems
- Alarm: confusion, inability to walk in a straight line, shortness of breath at rest, coughing up foam or pink sputum
Important: You cannot solve altitude sickness by “persevering”.”. The primary solution is: rest, do not climb any further and descend if necessary.
Further explanation and recognition:
Altitude sickness: symptoms, risks and treatment
Practical tips to improve your acclimatisation immediately
1) Drink smart: regularly, not compulsively
Dehydration makes altitude sickness worse. Aim for clear to light yellow urine. Drink throughout the day and don't forget salts (soup, electrolytes) if you sweat a lot.
2) Eat, even if you don't feel like it
At altitude, your appetite decreases. However, your body still needs fuel, especially as summit night approaches. Opt for easily digestible carbohydrates and small portions throughout the day.
3) Staying warm is acclimatising
Cold costs energy, increases stress and can ruin your sleep. Sleep warm, wear dry socks and a hat, and don't go to bed feeling “just a little too cold”.
4) Sleep strategy: routine and rest
Make your sleep as predictable as possible: eat early, do not drink litres of fluid just before bed, get your things ready, and take the time to relax.
5) Pace: you must be able to restrain yourself
The fittest people often run too fast at the beginning and pay for it later. Kilimanjaro is a game of endurance. You win through control.
Medication (such as acetazolamide) and acclimatisation
Some hikers use medication as support, such as acetazolamide (Diamox). This can be useful in cases of increased risk, but it is no substitute for a good schedule.
- Only use medication after consulting a doctor or travel clinic.
- Test any medication beforehand (side effects may affect your trip).
- Continue to follow the basic rules: ascend slowly, sleep well, drink well, take signals seriously.
Disclaimer: This article is for informational purposes only and does not replace medical advice.
Extra boost: pre-acclimatise at home with an altitude tent
Would you like to increase your chances of success, especially if you have a shorter schedule or are sensitive to altitude? Then pre-acclimatisation is a wise step.
By 4-5 weeks By sleeping in an altitude tent at home beforehand (at a controlled altitude setting), you will have a head start. As a result, many trekkers experience:
- less headache and nausea in the first few days
- sleep better on the mountain
- more energy towards summit night
- less stress about “will I make it?”
You may also wish to read the experiences of our Kilimanjaro customers
Ready to get started?
Rent a high-altitude tent through Altitude Dream (rental service)
Preventing altitude sickness: all measures at a glance
FAQ: frequently asked questions about acclimatisation on Kilimanjaro
What is the best number of days for Kilimanjaro?
8 days For most people, this is the best balance between time, comfort and chance of success. We recommend a minimum of 7 days.
Is Marangu (hut route) bad for acclimatisation?
It's not “bad” if you choose a long schedule, but in practice, Marangu is often done in 5-6 days. That's too fast for many people. The risk lies mainly in the short version.
Does being in top physical condition help prevent altitude sickness?
No. Being fit helps you walk, but it does not protect you from altitude sickness. Smart acclimatisation remains key.
When should you descend?
If symptoms increase despite rest, or if serious symptoms occur (shortness of breath at rest, confusion, loss of coordination), descending is the safest option.
Conclusion: the best acclimatisation schedule for Kilimanjaro
If you remember one thing, let it be this: Don't buy a “quick” plan, buy time.. Kilimanjaro is a mountain where extra days directly translate into greater safety, greater comfort and a better chance of reaching Uhuru Peak.
- Best choice for most people: 8-day schedule
- Good minimum: 7-day schedule with conscious acclimatisation moment
- Maximum margin and rest: 9-day itinerary (e.g. Northern Circuit)
Would you like to further increase your chances or do you have a tight schedule? Then pre-acclimatising at home with an altitude tent is a proven, practical step.
Start here: rent an altitude tent and request advice