Preparing for Kilimanjaro: the 5 key elements for a successful expedition
Published 7 June 2014 · 15 min read
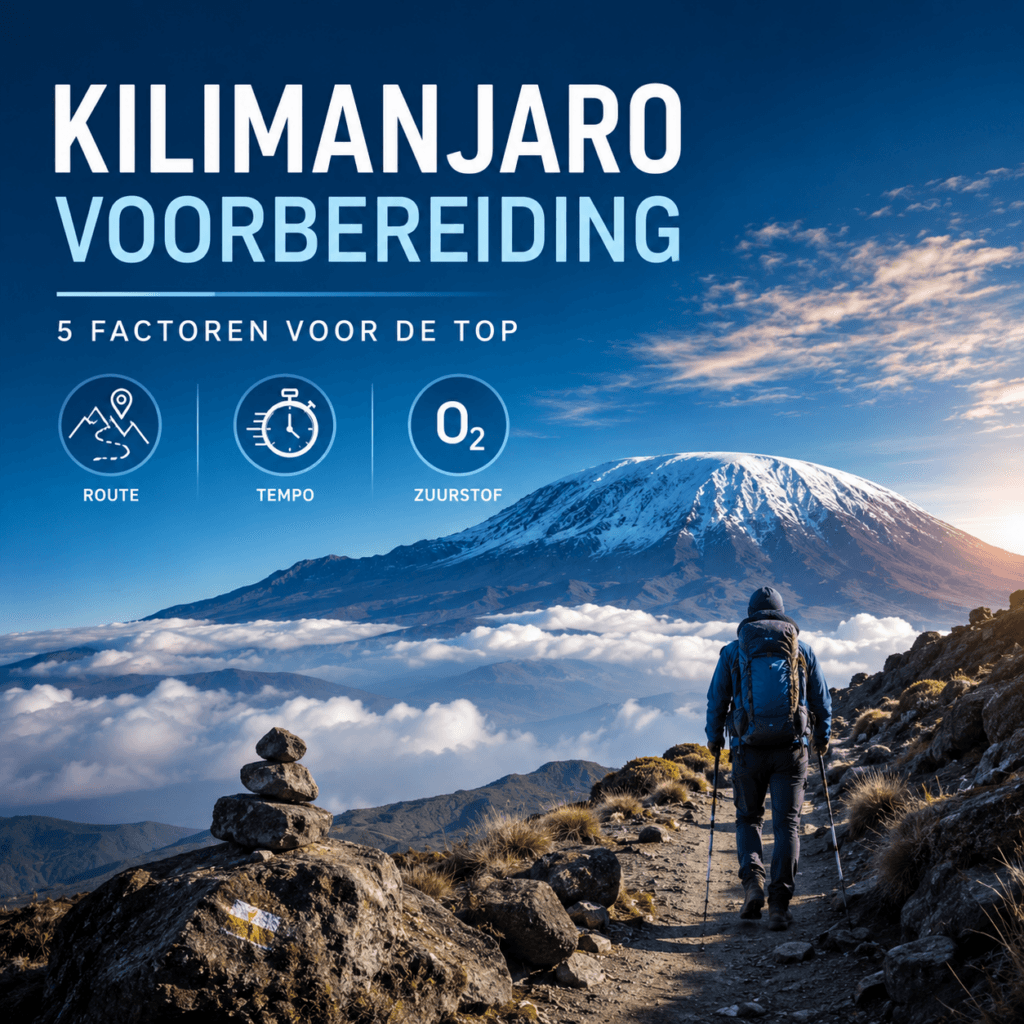
Kilimanjaro preparation It's not about one magic tip. You usually reach the summit by combining five factors well: route choice, pace, physical preparation, nutrition, and controlled acclimatisation. The latter, in particular, is often underestimated. You can be fit enough for long walking days, yet still have to turn back because your body isn't sufficiently accustomed to less oxygen.
The Kilimanjaro is not technically a difficult mountain. This very fact can make preparation seem simpler than it is. However, physiologically, the climb is serious. You ascend from a relatively low altitude to Uhuru Peak at 5,895 metres in just a few days. This makes a good plan more important than heroic willpower. Those who their Preparation for altitude Starting at home increases the likelihood that the body will react more calmly during the climb.
The 5 most important ingredients for a successful Kilimanjaro expedition are:
- Choose a route with enough acclimatisation days.
- Train your endurance, but don't overestimate your fitness.
- Loop extremely calmly: pole pole is not a cliché.
- Eat and drink consistently, even if you have less appetite.
- Prepare your body for altitude beforehand, ideally measurably and gradually.
Conclusion: A successful Kilimanjaro preparation combines fitness, pace, route planning and acclimatisation.
Nuance: Fitness helps, but it doesn't automatically protect you from altitude sickness.
Practical hook: Start measuring, planning and gradually acclimatising to lower oxygen levels well in advance of departure.
Why Kilimanjaro preparation is different from ordinary trekking
Many travellers prepare for Kilimanjaro as if it were a long walking holiday. That’s understandable, as you don’t need a climbing rope, crampons or technical mountaineering experience on most routes. Yet that is precisely the pitfall. Kilimanjaro is not a technical challenge, but a test of acclimatisation.
The altitude builds up quickly. Your body has little time to adjust. This means that even someone with a strong level of fitness may still experience problems, while a gentler hiker with better acclimatisation will reach the summit without issue. Therefore, you should not approach Kilimanjaro merely as a sporting challenge. You must view the expedition as a physiological project.
Good preparation therefore goes beyond breaking in shoes and taking practice walks. You want to know how you react to altitude, how your sleep holds up, how your recovery feels, and how to recognise complaints. Furthermore, you want to avoid discovering on the mountain that your body is struggling with the ascent.
Therefore, it makes sense to understand early on how altitude training and acclimatisation Working. Not because altitude training provides a guarantee, but because it makes your preparation much more manageable.
Practice interpretation: Kilimanjaro is often underestimated because the climb is technically accessible. However, the altitude remains the same. At nearly 5,900 metres, the oxygen issue is real, regardless of your fitness level, age, or hiking experience.
Kilimanjaro preparation begins with the right route
The first major choice is your route. Not every route gives your body equal time to acclimatise. A shorter programme might seem appealing, but at altitude, speed is rarely a wise option. Extra days increase the chance that your body will handle the ascent better.
The route not only determines your view and experience. The route also determines how quickly you sleep at higher camps, how often you can ascend and descend, and how much recovery time you get. Therefore, route choice is one of the most underestimated decisions in preparation.
When you're undecided between routes, it's best not to just look at price and number of days. Look primarily at the acclimatisation profile. A route with better pacing might seem harder on paper, but can be easier on your body. More days doesn't automatically mean easier walking, but it usually means more physiological margin.
For many climbers, it's useful to view the differences between routes via Kilimanjaro route and acclimatisation. Especially the difference between rising quickly and getting used to it gradually makes a big difference.
What makes a route stronger?
A strong Kilimanjaro route gives your body time. This means: don't ascend too quickly at high altitude, have enough trekking days, and ideally a profile where you reach a higher altitude on some days than your sleeping spot. This principle is often summarised as 'climb high, sleep low'.
Still, the reality remains that Kilimanjaro demands a lot of altitude in a short time. Even with a good route, summit day is still tough. That's why route choice is important, but not sufficient. You also need a calm execution.
| Choice | What it means | Practical interpretation |
|---|---|---|
| Short route | Less time to get used to the altitude. | More dependent on individual tolerance and luck. |
| Longer route | More days for acclimatisation. | Usually wiser for top chance and recovery. |
| Quiet profile | Better distribution of height loading. | A strong foundation for a safer expedition. |
What it means: less time to acclimatise.
Practical interpretation: more dependent on individual tolerance and luck.
What it means: more days for acclimatisation.
Practical interpretation: usually wiser for top chance and recovery.
What it means: better distribution of imposed load.
Practical interpretation: strong foundation for a safer expedition.
The physical basis: fit enough, but not overtrained
Good physical condition helps. You need to be able to walk for several days in a row, sometimes long distances, sometimes steeply, sometimes with tired legs. However, Kilimanjaro does not require marathon-level fitness. The challenge lies mainly in moving calmly while your body has less oxygen available.
That's why the best training is often simpler than people think. Long walks, steady endurance training, stair climbing, cycling, and strength endurance are useful. You don't need to follow an extreme plan. The most important thing is to be consistent.
Train your base fitness in the months before departure. Build up to long walks. Test your shoes. Walk with a backpack. And also plan for recovery. Setting off overtrained is a bad strategy. A body that starts the expedition tired has less margin to cope with altitude, cold, and poor sleep.
What exactly are you training?
- Endurance: long walks of 3 to 6 hours, preferably on hilly terrain.
- Muscle endurance Gentle climbing, stair climbing, light strength training and descending exercises.
- Material routine: Test shoes, socks, backpack, layers and snacks beforehand.
- Recovery: Ensure you get adequate sleep and build in rest weeks before departure.
- Mental peace Learning to move slowly without becoming impatient.
The last factor seems small but is important. Many fit people walk too fast. They feel strong in the first few days and build up an oxygen debt unnoticed. At lower altitudes, you barely notice that. Above 4,000 metres, that can suddenly translate into headaches, nausea, poor sleep, or loss of appetite.
Slowly, slowly: why walking slowly is your best strategy
On Kilimanjaro, you continuously hear the phrase: pole pole. Slowly, slowly. For many Western travellers, this feels almost unnaturally slow. Yet, it is one of the most important factors for success. Your goal is not to cover as many kilometres as efficiently as possible. Your goal is to accumulate as little physiological damage as possible along the way.
A low pace reduces the strain on your breathing, muscles and recovery. This gives you more leeway for altitude. Furthermore, you often eat and drink better when you're not constantly pushing your limits.
That's why "pole pole" is not a folkloric saying. It's a practical acclimatisation strategy. The guides know the rhythm of the mountain. Those who surrender to it usually have a better chance of starting the summit night fresh enough.
Wat is beter op Kilimanjaro?
Don't: a difficult start because the first few days feel relatively easy.
Do: From day one, walk as if you're already at altitude.
Why: Complaints about having too much to do often arise from an accumulation. You sometimes only notice a pace that's too high at a later stage.
A slow pace also helps mentally. You stop fighting the mountain. You go with the expedition's tempo. That makes the days calmer and the summit night more manageable.
Food and drink: keep it simple, execute consistently
Food and drink aren't miracle cures, but they do make a difference. At altitude, your appetite often decreases. Some climbers experience mild nausea. Others find that warm food doesn't agree with them as much. It's precisely then that staying consistent with eating is important.
Choose food you're familiar with. Test snacks beforehand. Bring along things you'd also eat when you have a poor appetite. Consider bars, dried fruit, nuts, salty snacks, soup, sports drinks, or simple carbohydrates. On the mountain, perfect food is less important than continuing to eat.
Drinking also deserves attention. Many climbers aim for about 3 litres a day, depending on conditions, exertion and personal needs. A hydration system can help, as it allows you to take more frequent small sips. Just be mindful of freezing on cold nights or summit day.
For some climbers, cola is experienced as a practical aid for nausea or low energy. This can make sense: it's sweet, familiar, and easy to drink. However, it shouldn't be seen as a medical miracle cure. Use it primarily as a simple energy source or emergency snack, not as a solution for genuine altitude sickness.
Reality check: Headache, nausea, and loss of appetite can be indicative of altitude sickness. Therefore, don't just pile on sugar, caffeine, or painkillers. Look at the overall picture: symptoms, sleep, pace, altitude profile, and recovery.
Kilimanjaro preparation with altitude tent: controlled acclimatisation to less oxygen
For many travellers, the biggest uncertainty is not their fitness, but the altitude. We hear this back from clients often. You can train for walking days. You can test gear. But you don't inherently know beforehand how your body will react to sleeping above 3,500, 4,000 or 4,700 metres.
This is why sleeping in an altitude tent can be part of serious Kilimanjaro preparation. An altitude tent works with normobaric hypoxia. This means the oxygen percentage in the air is reduced, while the air pressure remains normal. You therefore sleep at home in an environment with less oxygen. This makes sleeping the stimulus, while you can train, work, and recover normally during the day.
The goal isn't to set it as high as possible. The goal is to acclimatise gradually. A good protocol builds up slowly, looks at sleep quality, and uses SpO2 as a trend. This makes acclimatisation more controlled, measurable, and plannable.
A hypoxic tent does not entirely replace acclimatisation on the mountain. However, it can significantly reduce the chance of altitude sickness, as your body will have already gained experience with less oxygen before departure. This makes a particular difference on expeditions where the ascent is relatively rapid.
What our customers say
“Climbing Kilimanjaro with your father for your eighteenth birthday, that's something that stays with you for your entire life. During a speech at a dinner party, fuelled by too much to drink, I suggested this adventure to my daughter. The challenge was accepted: our fellow dinner guests were witnesses and, vain as we are, neither of us could afford to lose face.
All preparations were made quickly. We knew our fitness levels were good, but we couldn't estimate the effect of the altitude. As not reaching the summit was not an option, we slept in an altitude tent for the four weeks before our departure. The impact of this could not be underestimated. Only at 4,700m did we start to feel light-headed. It was a wonderful adventure. Below is the video of our adventure.”
Sven Van Steen

This experience sums up what preparation is all about. The physical foundation was there. But altitude remained the unknown factor. It is precisely there that pre-acclimatisation provides extra peace of mind.
Anyone who wishes to delve deeper into specific planning can also look at the best acclimation schedule for Kilimanjaro. This helps to better coordinate route choice, timing, and preparation.
A practical 4-week protocol for Kilimanjaro preparation
A height tent works best when you don't start aggressively. Especially with Kilimanjaro, the goal isn't to reach an extreme setting as quickly as possible. The aim is to sleep stably for several weeks with a stimulus that is strong enough, but not at the expense of recovery.
The example below is not a medical prescription. It is a practical framework for thinking. Individual response, sleep quality, symptoms, and morning measurements remain paramount.
| Phase | Target | What to look out for | Practical action |
|---|---|---|---|
| Week 1 | Gently getting used to sleeping with less oxygen. | Sleep, morning feeling and first SpO2 trend. | Don't increase too quickly. |
| Week 2 | Gradually increase the stimulus. | Recovery, headache, restless sleep. | Only increase on stable nights. |
| Week 3 | Stabilisation on a relevant expedition stimulus. | Morning values and training quality. | Hold on when things are going well. |
| Week 4 | Sleep soundly and leave refreshed. | No more unnecessary experiments. | Stability over ambition. |
Objective: slowly getting used to sleeping with less oxygen.
What to watch out for: Sleep, morning feeling and first SpO2 trend.
Practical action: Don’t increase too quickly.
Objective: To gradually increase the stimulus.
What to watch out for: Recovery, headache, restless sleep.
Practical action: only increase on stable nights.
Objective: stabilise at a relevant shipping incentive.
What to watch out for: Morning values and training quality.
Practical action: stick with it when things are going well.
Objective: Get a good night’s sleep and set off feeling refreshed.
What to watch out for: No more unnecessary experiments.
Practical action: Stability over ambition.
Practical protocol in one sentence
Start low, build up gradually, measure every morning in the same way, look at trends and only increase when sleep, recovery and complaint picture remain stable.
This is also why guidance is useful. Not because it has to be complicated, but because many people want results too quickly. When it comes to altitude training, more isn’t always better. The right amount is more important than the highest setting.
This is how you monitor this lens
Taking measurements makes your preparation less stressful. You don’t have to rely on guesswork. At the same time, you mustn’t misinterpret the figures. SpO2, in particular, is useful as a trend, not as an isolated absolute truth. A single outlier says very little. A pattern observed over several mornings says much more.
Ideally, take your measurement immediately after waking up, at a similar time each day and whilst at rest. Make a note of the reading, but also note down how you slept. Were you awake? Did you have a headache? Did you feel refreshed? Did you feel like eating? This will give you a useful picture of your condition.
| Measuring point | What you are following | How you interpret it |
|---|---|---|
| SpO2 trend | Morning values over multiple days. | Look at the trend and stability, not at a single reading. |
| Sleep | Fall asleep, sleep through the night and wake up feeling refreshed. | Poor sleep is often a signal not to increase. |
| Recovery | Energy, resting heart rate and how you feel during training. | A downward recovery usually calls for stabilisation. |
| Symptoms | Headache, nausea, dizziness, shortness of breath. | Complaints always take precedence over ambition in the schedule. |
What you're following: morning values over several days.
Interpretation: Look at direction and stability, not at a single measurement.
What you're following: fall asleep, stay asleep, and wake up refreshed.
Interpretation: Poor sleep is often a signal not to increase.
What you're following: energy, pulse rate and training perception.
Interpretation: A declining recovery usually calls for stabilisation.
What you're following: headache, nausea, dizziness, shortness of breath.
Interpretation: Complaints always take precedence over ambition in the schedule.
A good rule of thumb: if the quality of your sleep drops significantly, your symptoms worsen or your morning readings suddenly deviate significantly, do not increase the dose. Stay at the same level or reduce it slightly. Pre-acclimatisation works precisely because you can make controlled adjustments whilst at home.
To better understand how to read oxygen levels in the mountains, delve into oxygen saturation at altitude. This prevents normal altitude adaptation from being confused with a warning signal, or vice versa.
Common mistakes in Kilimanjaro preparation
Most mistakes aren't spectacular. They're tiny, logical and human. But together, they can minimise your chance of topping it.
- Take the short route: often based on budget or schedule, rather than on acclimatisation.
- Overshooting the condition: Being fit is not the same as tolerating heights.
- Walking too fast especially in the first few days when everything still feels good.
- Starting preparations too late: especially if you still need to combine material, training, and altitude stimulus.
- Normalising complaints Headaches and nausea deserve attention, especially if they worsen.
- Looking only at the peak day: The top day is often decided by the days before it.
Therefore, strong preparation isn't about training harder, but about pacing yourself smarter. This applies at home, during the journey, and on the mountain itself.
An altitude tent is useful for Kilimanjaro when you want to try and acclimate to the altitude before your trek.
A height tent is especially useful if you take altitude seriously and want to make your preparation planable. This is certainly true if you have limited route planning, little previous altitude experience, or simply want to set off with more confidence.
Well considering when
- you don't yet know how your body will react above 4,000 metres;
- if you think that punctuality is important and you want to leave little to chance;
- you have a relatively tight Kilimanjaro itinerary;
- you have time at home to build up gradually over 3 to 4 weeks;
- you want to objectively monitor with SpO2 trend, sleep and recovery.
Less logical when
- since you're leaving tomorrow;
- you don't have room to consistently sleep in the tent;
- you expect an altitude tent to eliminate all risks;
- you have medical complaints that first need to be discussed with a doctor.
The right expectation is important. An altitude tent is no guarantee and no substitute for good guiding, sensible route selection, and wise behaviour on the mountain. However, an altitude tent makes the acclimatisation process controlled, measurable, and plannable. This often significantly reduces the chance of altitude sickness.
Prepare your Kilimanjaro expedition in a controlled manner
Heading for Kilimanjaro and don't want to leave the altitude to chance? With 5000-metre preparation, you can acclimatise to lower oxygen levels at home, with guidance and measurable progression.
Conclusion: Kilimanjaro preparation is about margin
Climbing Kilimanjaro is an experience you won't soon forget. Precisely for this reason, the preparation deserves more attention than just fitness and equipment. You don't reach the summit through one trick, but by building up a buffer.
The margin is created by a good route, a relaxed pace, suitable training, consistent nutrition, and a well-thought-out acclimatisation strategy. A height tent can play a valuable role in this, as you can get used to less oxygen in a controlled manner beforehand. It doesn't remove the mountain, but it makes your preparation much stronger.
The best Kilimanjaro preparation doesn't feel rushed. It feels calm, measurable, and logical. You don't leave with the thought that you just have to wait and see how your body reacts. You leave with a plan.
Frequently asked questions about Kilimanjaro preparation
How long do you need to train for Kilimanjaro?
For most people, 3 to 6 months of focused preparation is advisable. Focus on long walks, steady endurance training, muscular endurance, and recovery.
Is fitness enough to reach Kilimanjaro?
No. Fitness helps, but altitude sickness is mainly related to acclimatisation, ascent rate and individual sensitivity. Even fit people can get symptoms.
How long in advance do you start using a high-altitude tent for Kilimanjaro?
Many travellers opt for around 4 weeks. This provides room to build up gradually, monitor the SpO2 trend, and keep an eye on sleep quality.
Kan een hoogte tent hoogteziekte volledig voorkomen?
No. A high-altitude tent does not offer a 100% guarantee. However, controlled pre-acclimatisation can significantly reduce the risk of symptoms.
Which route is best for acclimatisation?
A longer route with better altitude gain is usually more sensible than a short programme. Therefore, don't just look at the price, but also at the acclimatisation profile.