Acclimatising at home for mountain expeditions: acclimatising for 4000m
Published 9 January 2026 · 9 min read
Can you prepare for a mountaineering expedition up to 4,000 metres at home? Yes, to a certain extent. For many mountain travellers, 4000m is exactly the point at which preparation at home pays off the most: you reduce the risk of complaints in the first days, you often sleep more peacefully at altitude and you start with more confidence. In this article, you will read how mountain travel home acclimatisation for mountain expeditions works, which physiological adjustments you can and cannot accelerate, how to approach it practically and when guidance or a structured programme makes sense.
Important: acclimatising at home is a head start, not a licence. On site, ascending calmly and listening carefully to complaints always remains guiding.
Why acclimatising before 4000m is often underestimated
Many mountain travellers think that altitude challenges only start above 4500 or 5000m. In reality, the challenge starts from around 2500 m. The air still contains the same 20.9% oxygen, but the air pressure drops. As a result, less oxygen becomes available per breath and your body has to compensate immediately.
Around 4000m, oxygen pressure is roughly comparable to about 60% from sea level. You often notice this by:
- out of breath faster at a leisurely pace
- higher heart rate on light exertion
- sleep more restlessly and wake up more often
- headache, nausea or feeling of flu when rising too fast
Precisely because 4000m feels like “attainable” for many tours and summits, the pitfall is that your schedule becomes too tight. And a tight schedule is a known risk factor for altitude complaints.
What exactly does acclimatising at home mean?
Home acclimatisation (pre-acclimatisation) is the controlled exposure of your body to lower oxygen availability before you leave. The aim is not to fully acclimatise, but to give your body a clear stimulus in advance so that the first days at altitude feel less like a shock.
For mountain trips up to 4000 m, pre-acclimatisation focuses mainly on:
- faster and more efficient breathing at rest and sleep
- better distribution of oxygen to muscles and brain
- initial stimulation of adaptation processes such as EPO release
- mental habituation to “air shortage feeling” without panic
In practice, acclimatising at home works best if you think of it as part of your overall plan: training, recovery, sleep, itinerary and on-site acclimatisation strategy.
The physiology behind acclimatisation to 4,000m
What happens when oxygen pressure drops?
At altitude, the pressure of inhaled oxygen drops. Your body reacts through several systems at once:
- Respiration: you start breathing deeper and faster to get more oxygen in.
- Heart and blood vessels: your heart rate rises, especially during exercise, to transport oxygen faster.
- Blood production: Your kidneys make more erythropoietin (EPO), which stimulates red blood cell production.
- Acid-base balance: increased ventilation changes CO2 levels, affecting sleep and recovery.
Some of this response starts within hours. Other adjustments take days to weeks. Therefore, “just a few nights” is usually not enough to get a lasting effect.
Why 4,000m is a realistic goal for home preparation
Up to about 4000 m, you can gain a lot from a controlled, conservative build-up. Above that limit, the physiological load increases faster and the effect of real altitude and a well-constructed itinerary becomes increasingly important.
Acclimatising at home mainly helps you get off to a more comfortable and stable start in the first few days. It does not replace on-site acclimatisation, but it can improve your “starting position”.
For whom does acclimatising at home make sense?
Not everyone needs pre-acclimatisation. It is especially interesting if one or more of these points apply to you:
- you go quickly from low to 3000-4000m (fly, ride, lift, short run-up)
- your itinerary is tight and you have little buffer for extra rest days
- you were more likely to have complaints at altitude, even if that was mild
- you don't just want to “fetch” but also enjoy the trip as much as possible
- you want to improve your recovery and sleep at altitude
If you have a medical condition, take specific medication or have experienced severe altitude sickness before, always consult with a doctor with travel or altitude experience. For general guidelines, you can also consult the advice from UIAA and CDC: UIAA: preventing altitude sickness and CDC Yellow Book: altitude illness.
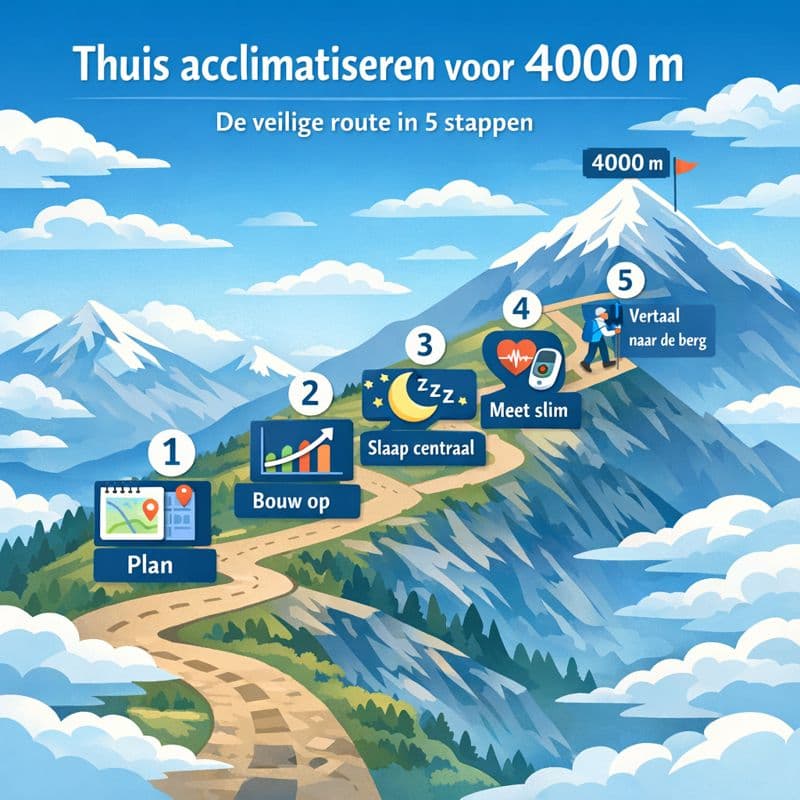
Practical approach: this is how to acclimatise at home for 4,000m
An effective approach for 4000m is above all: conservative, consistent and tailored to your travel profile. Below is a practical itinerary that makes sense for most mountain travellers.
Step 1: translate your destination into sleep highs and moments of risk
Note not only your highest point, but especially your sleep heights per day. Sleep level determines your recovery and is usually the best predictor of symptoms. Include passes, day trips and displacements.
Find this difficult? Then use a simple rule: above 2500-3000 m, a gentle build-up is important, with limited increases in sleep height. You can find a practical guide in our article what is a normal acclimation rate per 1000 metres?
Step 2: choose a build-up that supports your recovery
Acclimatising at home works best if you put sleep and recovery first. Building up too aggressively often results in restless nights, lowering your net effect. A conservative build-up is usually more effective than “as high as possible”.
If you work with an altitude tent or similar hypoxia solution, for an expedition we keep to a maximum of 5000m as a practical guideline:
- minimum 3 weeks to build stable habituation
- maximum 5 weeks, depending on recovery, sleep quality and goal
The bottom line: rather stable and good sleep at a moderate simulation altitude than variable and bad sleep at too high a setting.
Step 3: make it measurable, but keep it simple
Measuring can help, as long as it doesn't make you agitated. Practical signs:
- Resting heart rate in the morning (trend is more important than a single reading)
- subjective sleep quality (how often awake, how rested)
- feeling of breathlessness when falling asleep and at night
When you measure SpO2: always do so warmly, quietly and at the same time. One measurement says little, but a trend can help.
Step 4: combine with light, sustained fitness training
For mountain trips up to 4000 m, your goal is functional load capacity: being able to move for long periods with a backpack, without peaking. Build your base with walking, pedalling, gentle running or cycling. Intensive interval training in hypoxia is not necessary for most mountain travellers.
Step 5: translate your home bias into on-site behaviour
A common mistake is that people start ascending faster after pre-acclimatisation than their schedule actually allows. Think of acclimatising at home as a buffer for comfort, not a reason to ignore rules.
On the ground, these principles remain guiding:
- quietly build up sleeping height
- take acclimatisation days seriously
- Feel free to move higher during the day, but sleep lower (climb high, sleep low)
- Don't ignore poor sleep, it is often an early warning sign
If you want the full basics around complaints and decision moments sharp, also read preventing altitude sickness: complete guide.
How Altitude Dream looks at home acclimatising for 4000m
At Altitude Dream, we approach home acclimatisation not as a separate tool, but as part of a broader acclimatisation strategy. Especially around 4000m, we see in practice that the difference is not in “how high you simulate”, but in how thoughtfully and consistently you prepare your body.
Our experience with mountain travellers going to 3500-4500 m shows that a well-constructed pre-acclimatisation programme helps especially with:
- a calmer start to the journey
- fewer complaints in the first days at altitude
- better sleep quality during the acclimatisation phase
- more confidence in own body
For destinations up to 5000 m, we do not recommend extreme altitude simulations, but a controlled approach that matches the real altitude profile of your trip. Pre-acclimatisation is meant to support, not force.
Common mistakes when acclimatising for 4,000m
1) Too fast, too high, too long
Setting more hours or higher does not automatically deliver more effect. Overload is reflected in worse sleep, higher resting heart rate and feeling “rushed”. Downshifting is often the best choice then.
2) Thinking condition offers protection
Good fitness helps you move but does not protect against altitude sickness. Altitude sickness is mainly a matter of physiology, rate of ascent and recovery.
3) Wrong expectations
Acclimatising at home can reduce risk and increase comfort, but it never prevents altitude sickness with certainty. Therefore, decision moments and symptom recognition remain important.
4) Not linking to the itinerary
Pre-acclimatisation works best if it ties in with your first days on site. If you fly to 3200m and go to sleep as early as 4100m on day 2, your preparation and plan should be geared to that.
What do other mountain travellers experience around and above 4000m?
The value of acclimatising at home often only really becomes apparent in practice. In client reviews of travellers who have specifically operated around 4000m (and sometimes higher), we see recurring themes: calmer starts, fewer complaints and better sleep than on previous trips.
A few brief examples from experiences of +4000m travellers:
- “Didn't suffer from altitude sickness like it used to.” (Mont Blanc, +4000 m)
- “I was able to start at 3400 metres without any problems. Also higher no problems up to 4800 metres.” (Mont Blanc, +4000m)
- “No altitude sickness unlike people around me. Two weeks at 4500 m.” (Mont Blanc, +4000 m)
You can find more experiences of mountain travellers who specifically prepared for expeditions around 4000 m via customer reviews for 4000 m expeditions.
Obvious red flags: when to intervene or adjust?
A practical rule: mild symptoms that improve with rest and an extra night at the same altitude are often OK. Complaints that increase, shift your plan.
Take extra rest or descend if you:
- have a headache that does not subside with rest and simple pain relief
- remains nauseous or vomits repeatedly
- significantly worse sleep and your recovery decreases every day
- become dizzy, shaky or confused
- are short of breath at rest, or experience a marked decrease in exertion capacity
In doubt? In the mountains, “an extra day” is often the cheapest insurance you can take.
Practical depth: this is how you link preparation to your destination
Many mountain travellers do not just go to 4000m, but combine this with routes in the Alps, Andes or Himalayas where you quickly pass different altitude zones. If you are looking for practical preparation around popular treks and altitude profiles, also check out: the best preparation for a trek to Kilimanjaro or Everest Base Camp.
Think of this article as the foundation: first understand and plan your acclimatisation, then fine-tune your destination.
When is home acclimatisation guidance a logical choice?
Not every mountain traveller needs guidance. But those who have a tight travel schedule, have experienced complaints at altitude before or want to take their preparation seriously can benefit greatly from a structured approach.
For mountain expeditions up to 4000m, more and more travellers are opting for a programme in which:
- the simulated height matches the destination
- the structure is conservative and underpinned
- sleep and recovery are central
- advice is available in case of questions or signals
To this end, Altitude Dream offers specific programmes tailored to expeditions around 4000 m, based on practical experience, physiology and individual load capacity.
For those looking to prepare properly for a mountain trip around 4000m, it may be useful to consider the options for home acclimatisation targeted at 4000m review and seek advice on an appropriate course of action.
Summary: sensible acclimatisation starts at home, but ends on the mountain
Acclimatising at home can make your start at 4000m noticeably more comfortable, especially if you ascend quickly or have little slack in your itinerary. You'll see the best results with a conservative build-up, a focus on sleep and recovery, and a smart translation into on-site behaviour.
Those who get this right will increase the chances of not only reaching the altitude, but also really enjoying the trip.